React Native at Hipcamp
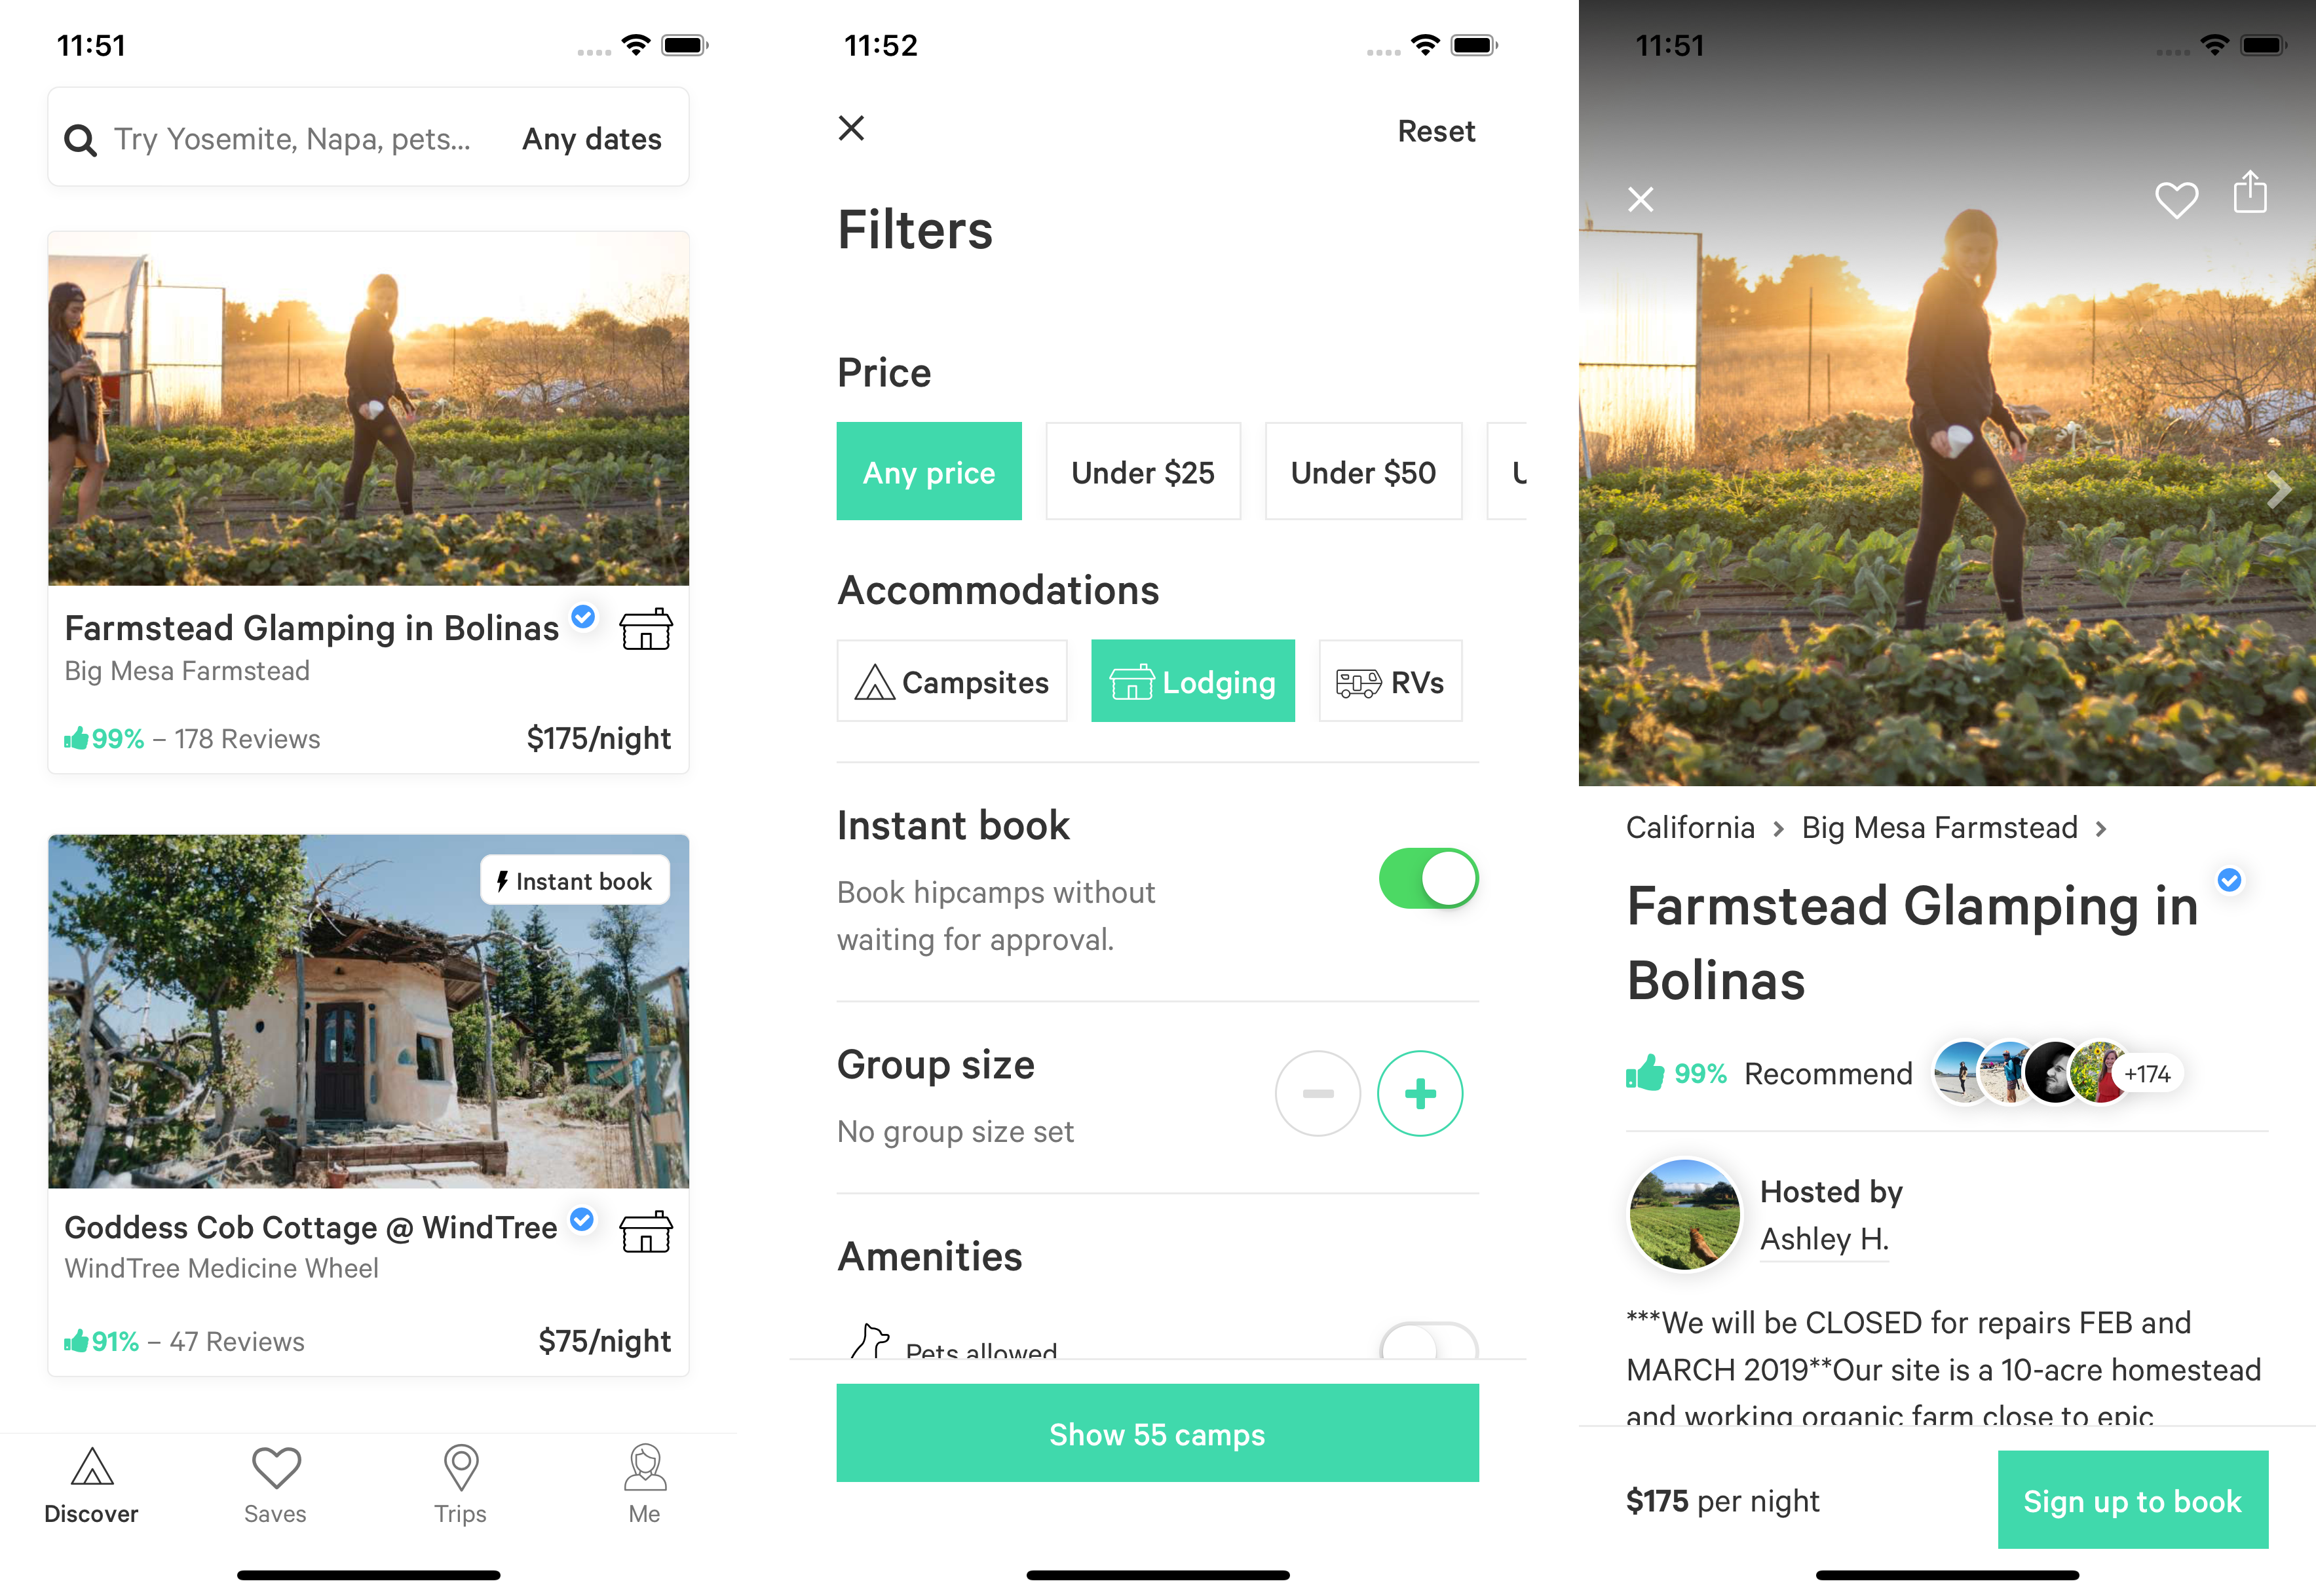
👋 Hi I'm Derek, the lead engineer for the native mobile team at Hipcamp. I'm probably not supposed to pitch Hipcamp as the AirBnB for getting outside and camping, but hopefully that gives you some point of reference for our product! Our mission is to get people outside and we recently shipped our first native app for iOS to make that even easier for folks. We built our app using React Native and I wanted to share a high level overview of our reasoning and some implementation details.
Why React Native?
Hipcamp's engineering team is pretty small. We're at 13 now and even less when we decided to work on this project in earnest. As start ups tend to do we had fewer resources than needed to attempt various initiatives which meant being strategic with our technology choices. A shared compentency with our budding eng team is JavaScript so React Native was on our radar and a green field project meant we weren't already tied to another technology like Swift. This appealed to us because we could start our native mobile initiative with one dev and other folks on the team could help out as they free'd up or when we got closer to shipping.
We had a fairly tight deadline as well. Hipcamp's business is seasonal and we wanted to get ahead of Summer 2019 when lots of folks think about camping. Another engineer had built a proof of concept in March 2018 using React Native as well which helped inform the feasibility of quickly building a MVP, but making it production ready before Summer 2018 wasn't realistic. I was hired in September 2018 without having built a full React Native app. I got started in earnest early October which gave us about 7 months to get something production ready. I don't think this would have been possible if it weren't for the fast feedback loop provided by React Native as well as being able to get another fulltime JavaScript engineer on the team to help with the project in early 2019.
Borrowing from most other playbooks we knew we'd focus efforts on shipping an iOS app first and do a fast follow up with an Android app. While we weren't optimizing for code-reuse in order to get an iOS MVP out it was fairly easy to build with mutli-platform use in mind. A lot of our core UI components render on Web and Android which has been mostly helpful for documentation (rendering components in storybook/gatsby), but will make building production apps for other platforms much less painful.
At a time when a company like AirBnB was sunsetting their usage of React Native, we still felt 100% confident it was the right platform for our small team of mostly JavaScript engineers to invest in. Almost 9 months later we're in a great place with a production app in the AppStore, progress on shipping to other platforms and producing bi-products like a cross-platform UI component library that will benefit other product teams to come!
Key 3rd Party Libraries and Dependencies
I won't go too in depth with any of these, but check out our stackshare over the next couple of weeks for more info behind the decision making for all of these. And for context we're using React Native 0.57.7 at the time of this writing.
Project Structure
Hipcamp.com is a super reliable Rails app deployed to Heroku. It's been around for about 5 years which means a lot of patterns, technologies and in general history. We opted to start a new repository for our mobile app, but are organizing this new repo as a mono-repo with many separate packages that sit alongside the mobile app project. BTW we refer to the mobile app by a the code name "pocketknife".

The most intereting bits are probably in our src directory.
components
Our app specific components. These are higher level widgets (or extension and framework components when borrowing language from this article) so things like a Map and Carousel component. They're typically made up of components from our core component library (see hcui below) and presnetational (e.g. they don't interface with any data directly other than what the caller/parent component passes in and any internal react state).
config
Our config is driven by .env files using a combination of dotenv and react-native-config. Instead of accessing the config directly in our application code, we wrap the react-native-config import and add typing information. With this setup we can share the same config between iOS and Android builds as well as swap out the underlying implementation without needing to update our application code. We can also easily run builds against different configs fairly easily.
# ENVFILE=.env.staging react-native run-iosyarn ios# react-native run-ios (runs against local instance of our API)yarn ios:local
hcui
This is our core component library that has all of our low-level UI building blocks. It's inspired by https://rebassjs.org and other design system libs that have come out over the last couple of years. Components are built using styled-system and styled-components, minimal in purpose and highly reusable. We also store our theme here which encapuslates a lot of rules from our budding design system efforts.
hoc
Short for Higher Order Component. Here we keep all of our shared HOCs that can be used across screens. When we upgrade react-native we'll most likely use Hooks going forward and refactoring our HOCs and Render Props to Hooks when and where it makes sense.
This is where most of our routing concerns live. react-navigation has a concept of Navigators that essentially configure aliases for Screen components and how they might relate to eachother. We don't co-locate screens with navigators since Screen components can be reused in multiple navigation contexts (e.g. our Auth screens can be used in an Onboarding navigator as well as our global Application navigator).
Read more about these concepts in the react-navigation docs.
screens
Each Screen is typically a directory containing the Screen component and a directory structure almost mirrors src in that a Screen can have it's own components and hoc directories for example. The idea being these resources are specific to that Screen and it makes sense to co-locate them. If we find ourselves duplicating these resources we consider bubbling them up in to a generalized abstraction when it makes sense.
In addition to each Screen directory there is a top-level components directory where shared “connected” components go. These are usually thin wrappers around our app specific components that provide data from our API or local app state like current user.
services
Catch-all for any lower-level code or libs that interface with a data source or have side effects. Things like a wrapper around AsyncStorage or our API client. TBH we're probably overloading the term, but it's chill.
types
Any type definitions for 3rd party libs that don't support TypeScript.
Other fun bits:
We use babel-plugin-module-resolver to allow aliasing imports from our
srcdirectory.import config from '~/config'
Eventually we'll move
hcuiin to a separate package that we publish for other projects to consume.The only dependency we keep in
vendoris the native FacebookSDK because we can't install it via cocoapods with our current version of react-native.
Design System
Calling it a Design System is generous, but we started our Hipcamp Core UI (HCUI) component library with this project. It's been beneficial for us to have started implementing with design system thinking in mind even though we didn't have one at the time. Since starting there's been a lot of collaboration with design and discussion driven by decisions and implementation for HCUI that will impact other projects in the near future.
While we are only optimizing for native platforms, we opted to build on top of react-native-web and have some documentation using gatsbyjs that uses HCUI components for rendering documentation of HCUI components… SO META! That is to say these components can render in the browers in addition to native platforms. react-native-web is an awesome project allowing us to quickly add browser support, but I think over time we'll end up writing browser (and maybe even platform) specific implemtnations for each component for more semantic markup on the web. You can peep the early doc here.
API Access and State Management
We wanted to use a shared syntax for accessing application data using graphql. In theory this is a really great goal and I think we'll get there, but in practice it can be less intuitive than going with more established patterns for things like fetching data from a REST API and storing global state in redux. Sometimes it can be difficult to decide where certain business logic should live, did this data come from a server or is it local only state… It's a long bet on us moving to graphql on the backend, so the trade off is awkward ergonomics for new-comers.
So as of today we're primarily accessing local state (like the currently active Filters and their values) and API data (current listings based on Filter state) through graphql using the Apollo client which is pretty neat. To accomplish this we use apollo-link-rest and apollo-link-state (note: apollo-link-state actually comes bundled with the latest version of Apollo) which provide graphql directives for specifying the data source in our queries.
Testing
Not going to lie… We have ZERO automated testing. [UPDATE] we totally have tests now! It was a trade off we made given the time contraint and other tools in our belt to help mitigate risk and give us confidence in our production offering. Without going in to too much detail here it's a cocktail of TypeScript, Prettier, linting and manual QA testers as well as a catch all “did our app launch without crashing” check as part of our Continuous Delivery pipeline.
We do have some testing infra in place… Jest is configured and running a health check to make sure we don't introduce any config that will be difficult to debug down the road as we start introducing more testing. We also will be doing a fast follow up with Detox tests for our end-to-end story and leveraging native-testing-library to help keep tests focused on providing confidence and avoiding testing implementation details.
Continuous Delivery
We use Microsoft's AppCenter which watches branches in Github and automatically runs builds that can be distributed to internal groups or externally via TestFlight and then promoted to the AppStore. This was really useful in getting early builds out before we even needed to concern ourselves with the AppStore and TestFlight setup. Delivering to internal groups via AppCenter doesn't require review which makes for a lightning-fast feedback-loop. Not to mention the time and CPU cycles saved by not running builds locally on our dev machines!
More To Come!
There's so much to unpack with a project like this that's difficut to fit in one post. Hopefully this provides enough of an overview to provide guidance or validation in some choices you may have made in your own react-native projects. Feel free to leave a comment or reach out on twitter http://twitter.com/drk if you want to talk react-native!
If you're a react-native dev or are interested in what we're doing at Hipcamp check our careers page! We're hiring for all sorts of roles.
To reply you need to sign in.