🥛Milk Bread (Tang Zhong Method)
This recipe makes enough for 8 smaller buns or 4 quite jumbo ones. If you put it in a tin, you can make 3 large ones. I usually cut this recipe in half because I’m only baking for 2 people and I like mini sized things!
Ingredient List
Tang Zhong Starter
15g bread flour
90ml whole milk
Dough Mixture
300g bread flour
5g instant yeast
5g milk powder
120ml whole milk
1 egg, beaten
40g soft butter
3/4 TSP salt
2 TBSP white granulated sugar
Egg Wash
1 egg with some water or milk
Step 1: Make the Tang Zhong Starter
Mix 15g bread flour and 90ml whole milk until dissolved.
Heat it in a pan or pot over medium / low heat until it turns into a paste. It will take ~5 minutes.
Be sure to constantly move the mixture around, as it turns into a paste quite suddenly at the end and burning it is not great
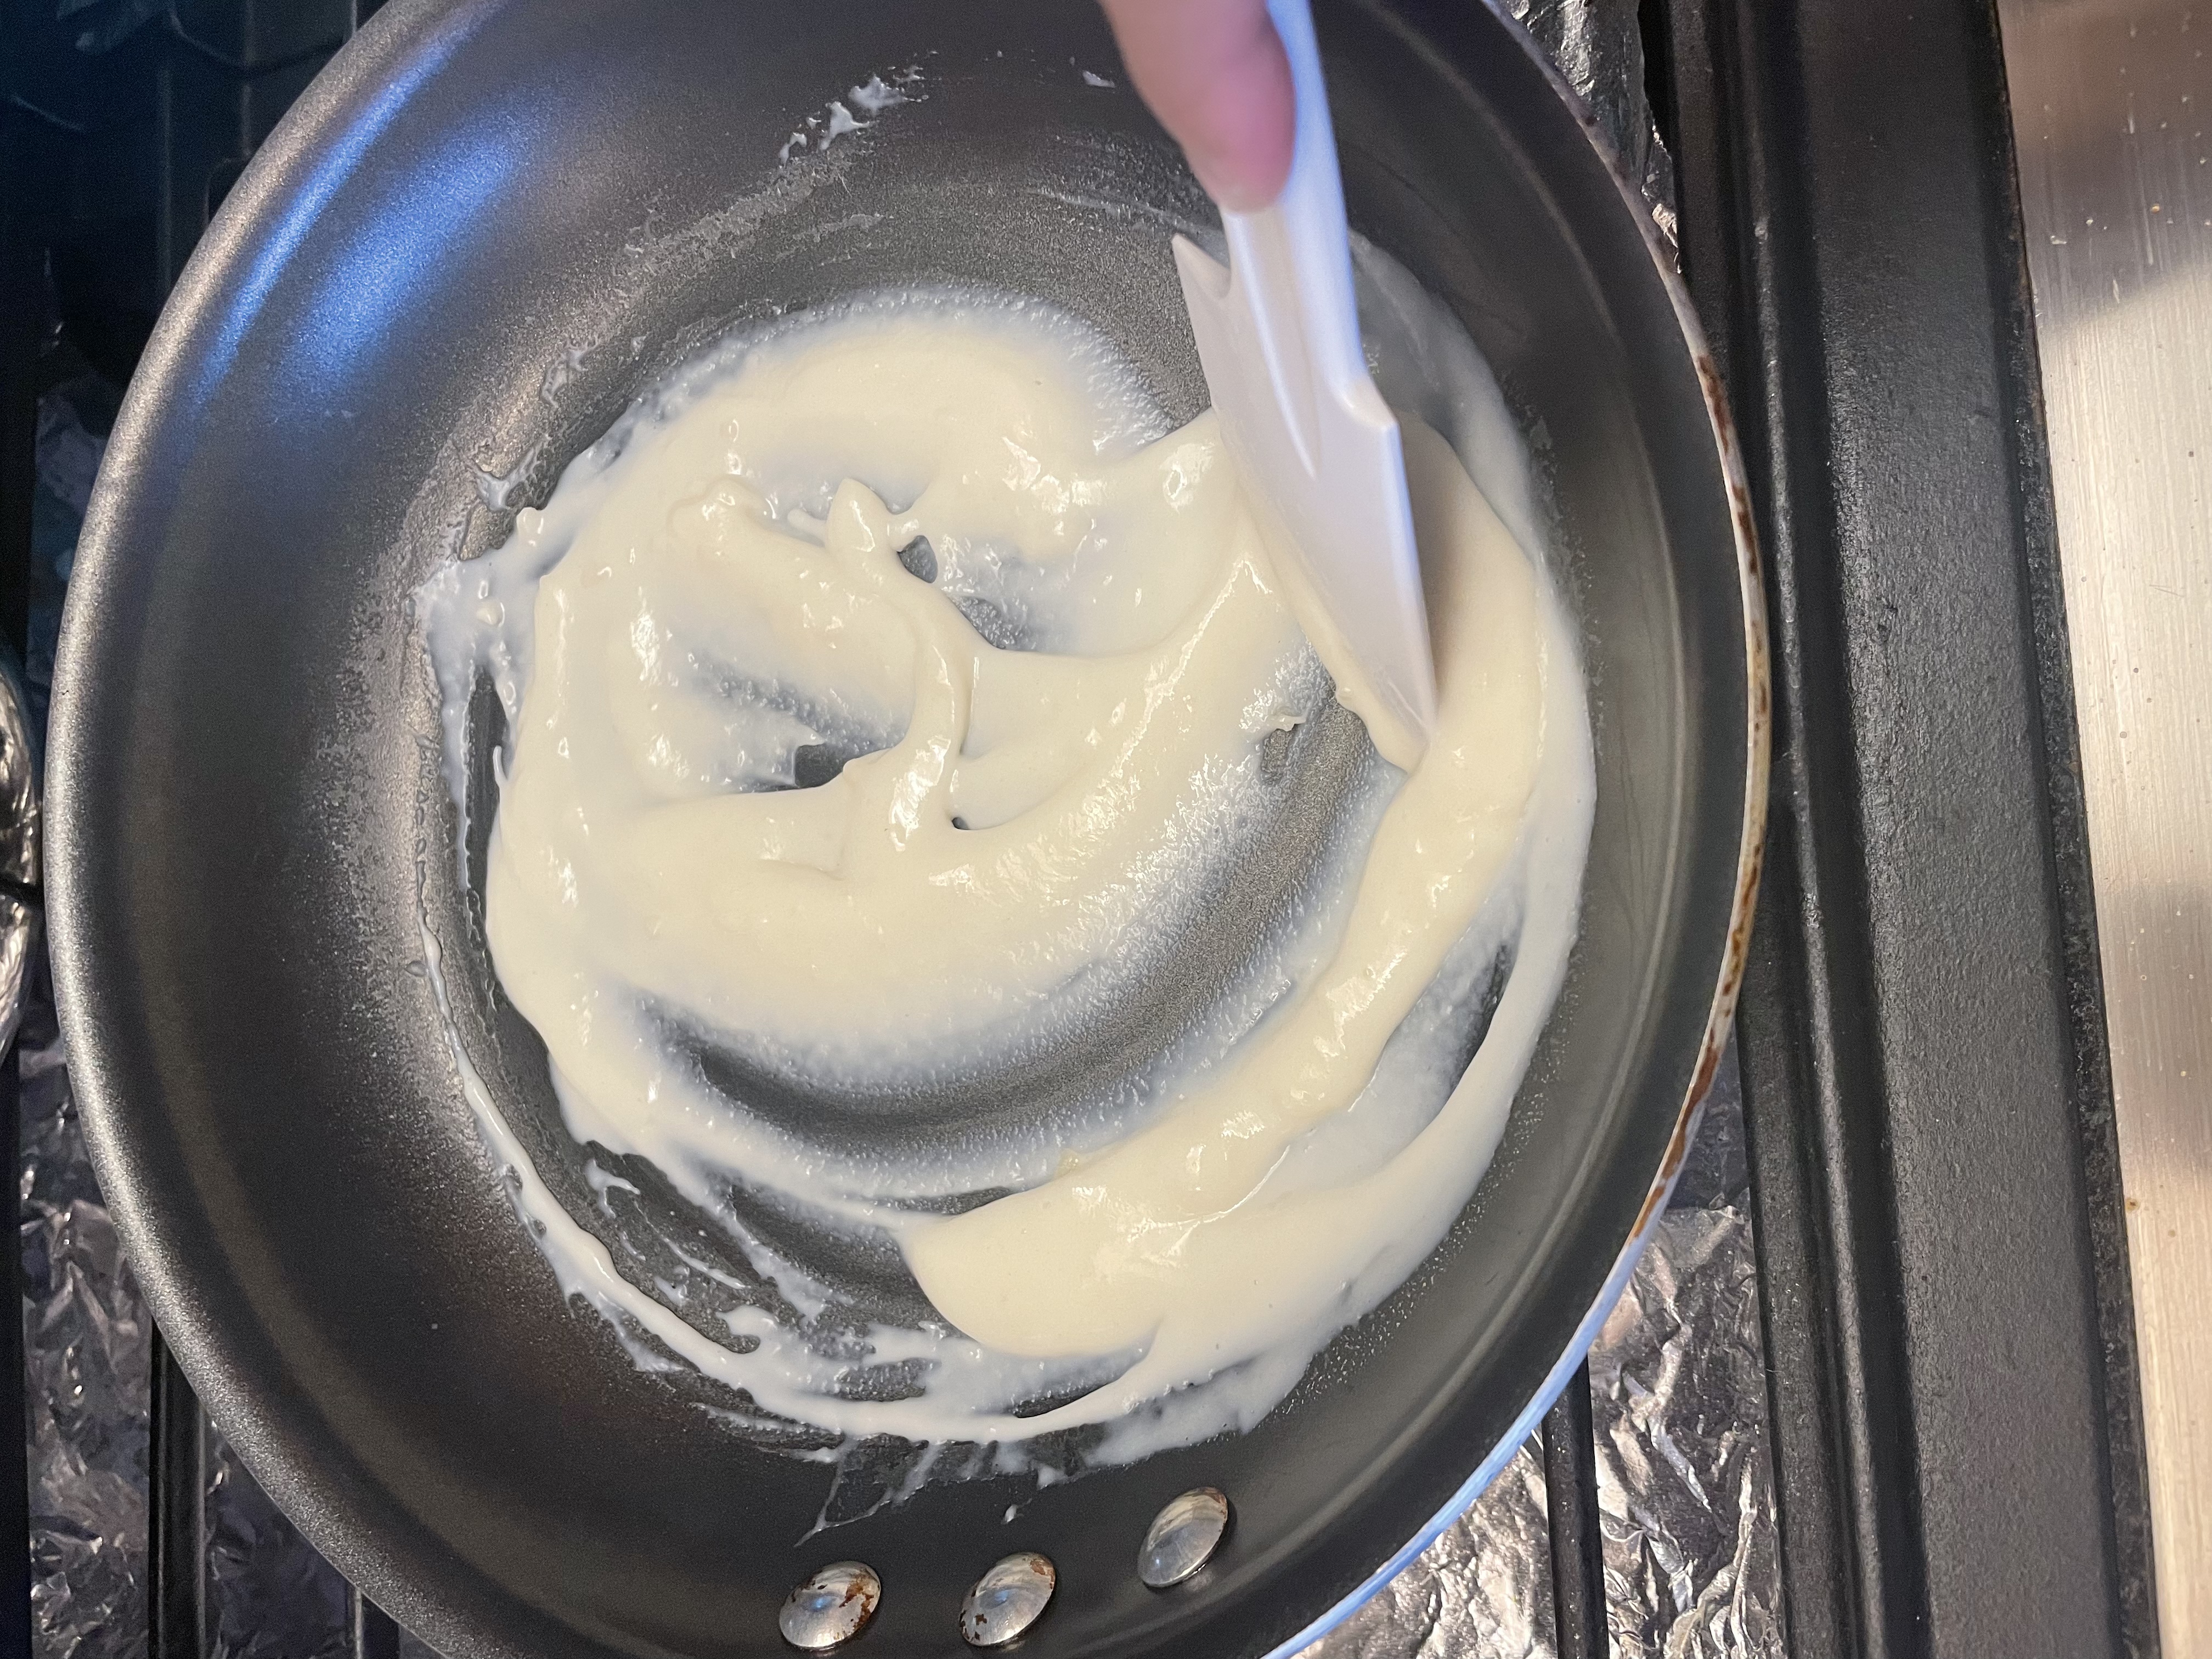
Put this paste into another cup or bowl to set aside. This is your Tang Zhong starter! Make sure you don’t leave the heat running because then the whole thing will dry out.
Step 2: Make the Bread Dough
Combine 300g bread flour, 5g instant yeast, and 5g milk powder in a big bowl.
Dig a little hole and pour in 120ml whole milk, 1 beaten egg, and add back in your Tang Zhong starter that you set aside previously.
Note: You can combine separately and then add in, but I have never mixed all this together in a separate bowl before adding, don’t think it is necessary.
Combine together slowly with a spatula / spoon or hands. It will look quite rough and sticky.
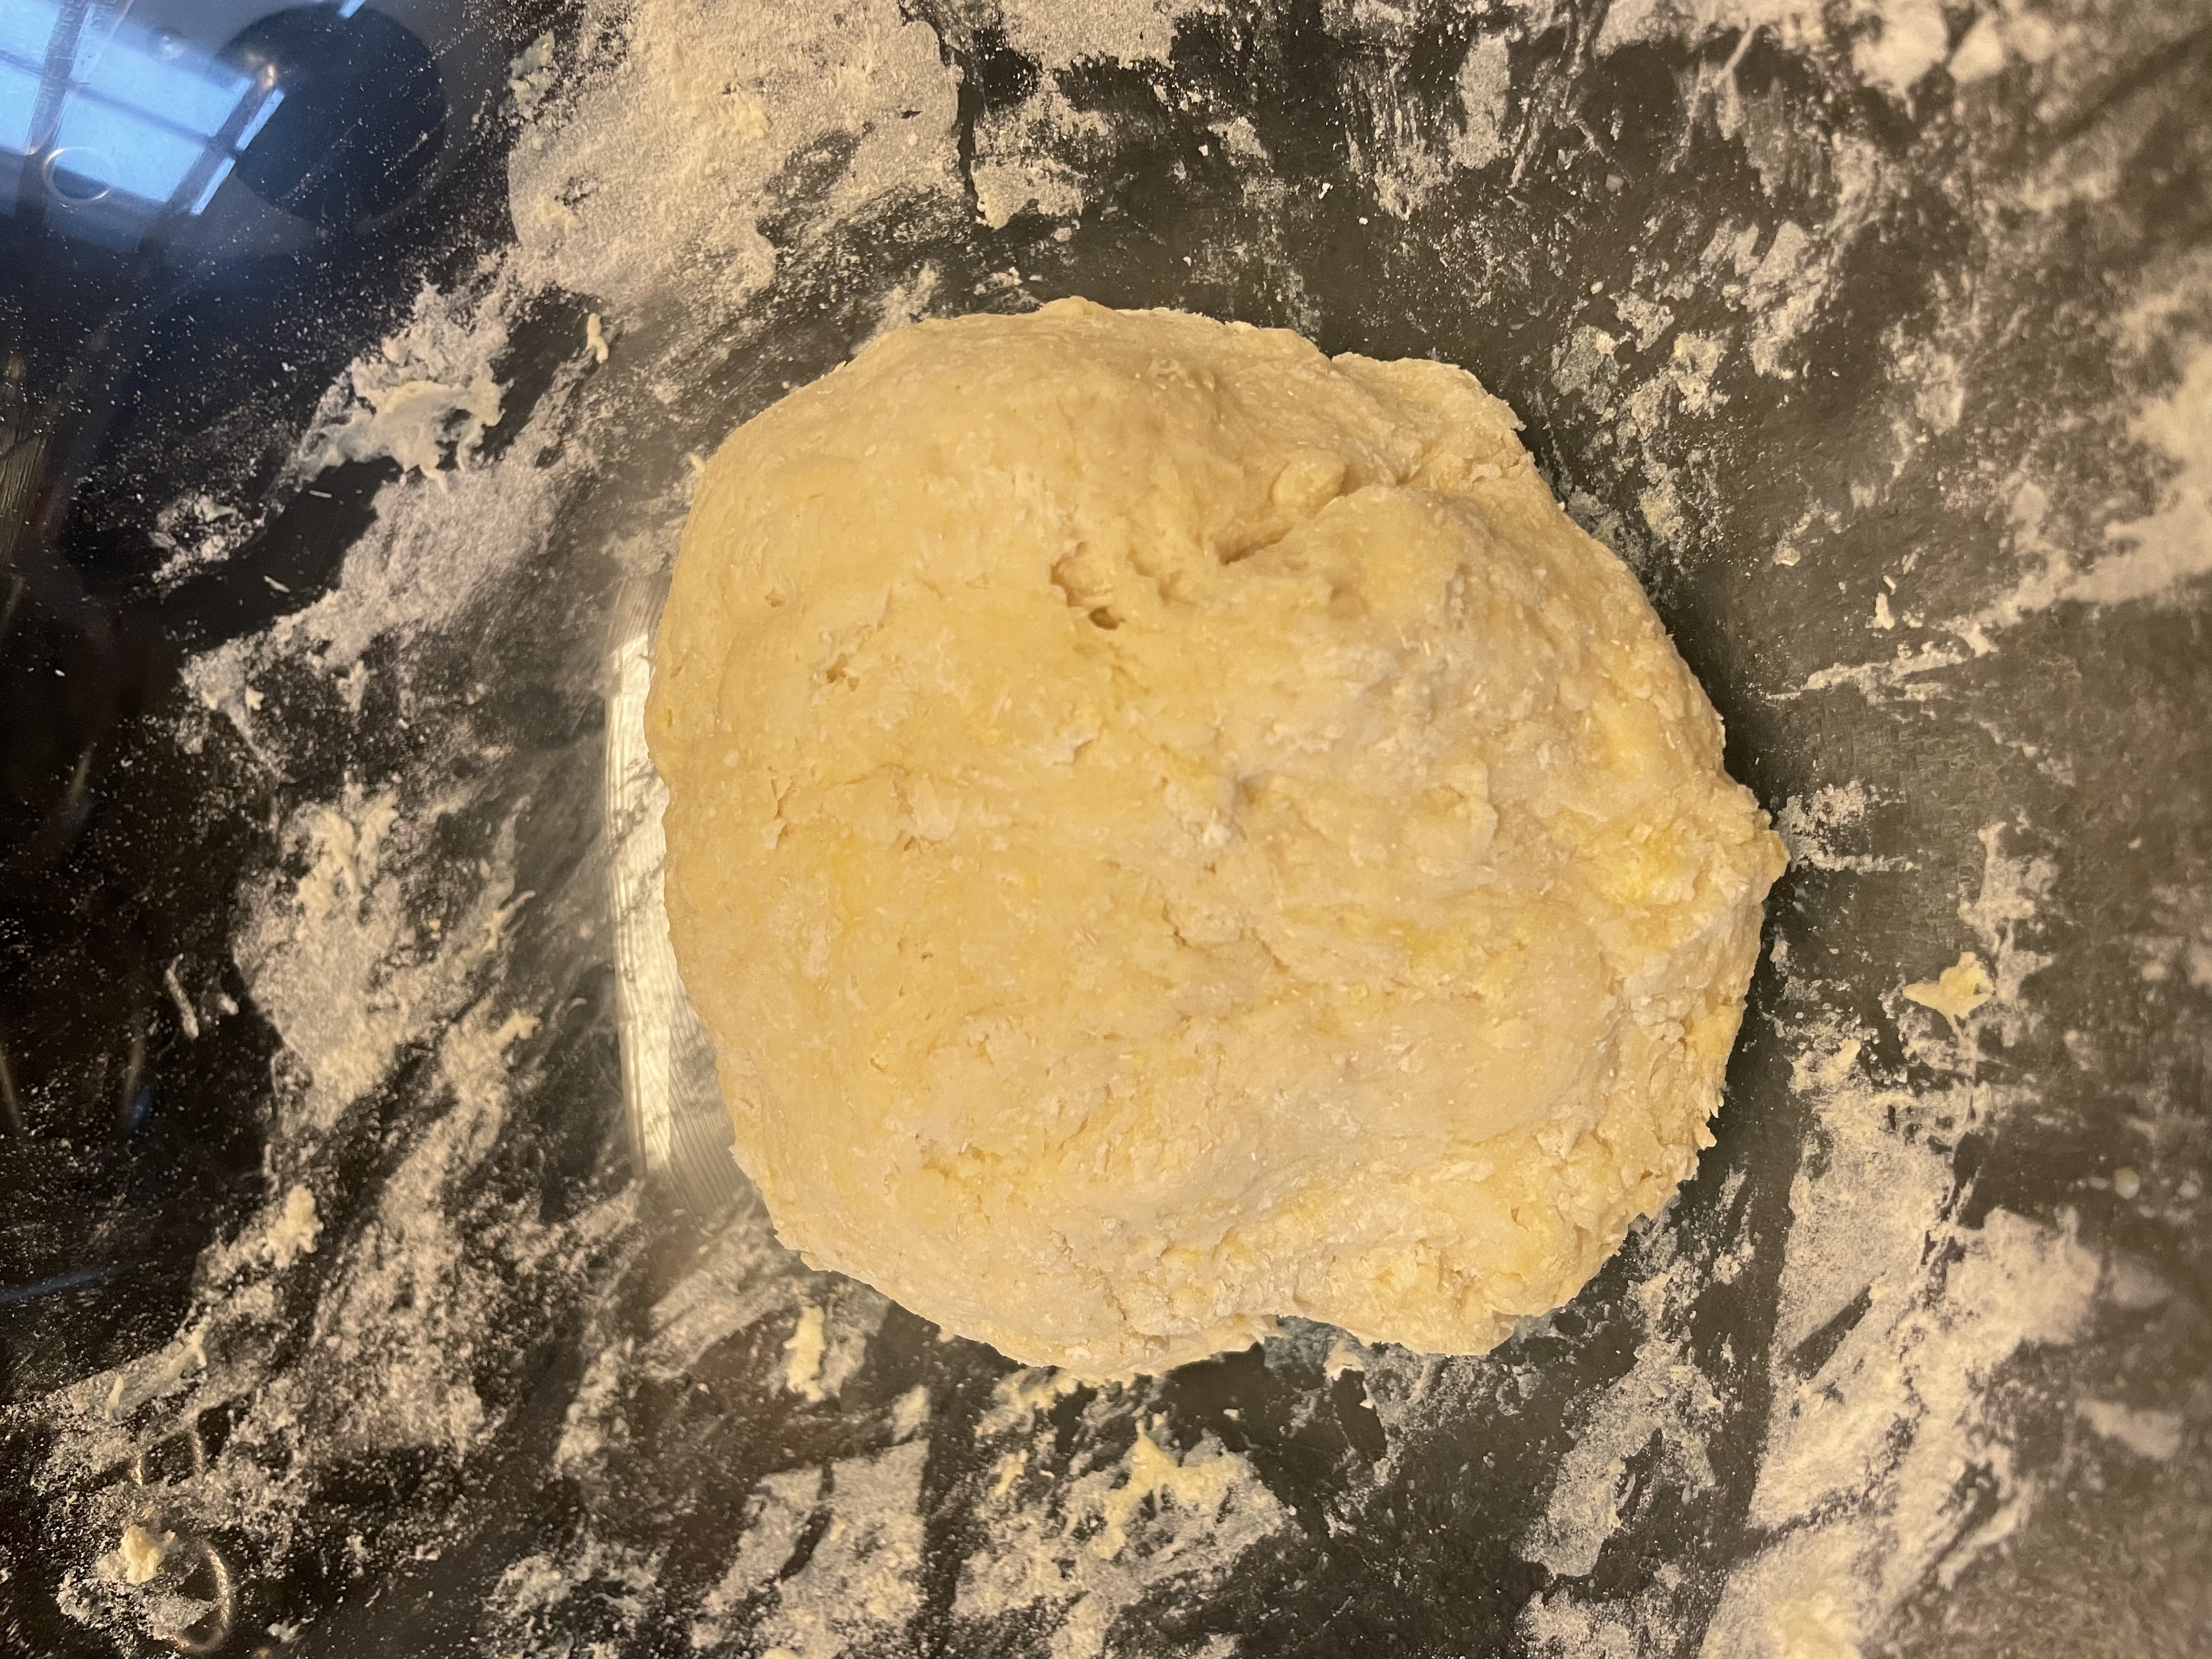
Once it is properly combined and lumpy (no need to knead or anything) set it aside (I leave it out on the counter) for 20 minutes. We are now entering the ~ autolyse period ~
Give your rested dough a hand knead for 1-2 minutes. You shouldn’t see any yeast particles anymore.
Add 2 tablespoons of sugar and 3/4 teaspoon of salt into the dough. Knead with your hands or with a mixer (easier with hands)
It’s going to be super grainy and you’re going to think everything went wrong. Trust the process and keep kneading, combining in the salt and sugar! Give it a few minutes. Adding in the salt late is important!
Once combined, add 40g of soft butter in cube by cube or just in chunks to make your life easier. Use a mixer or hands, this will take 10-12 minutes.
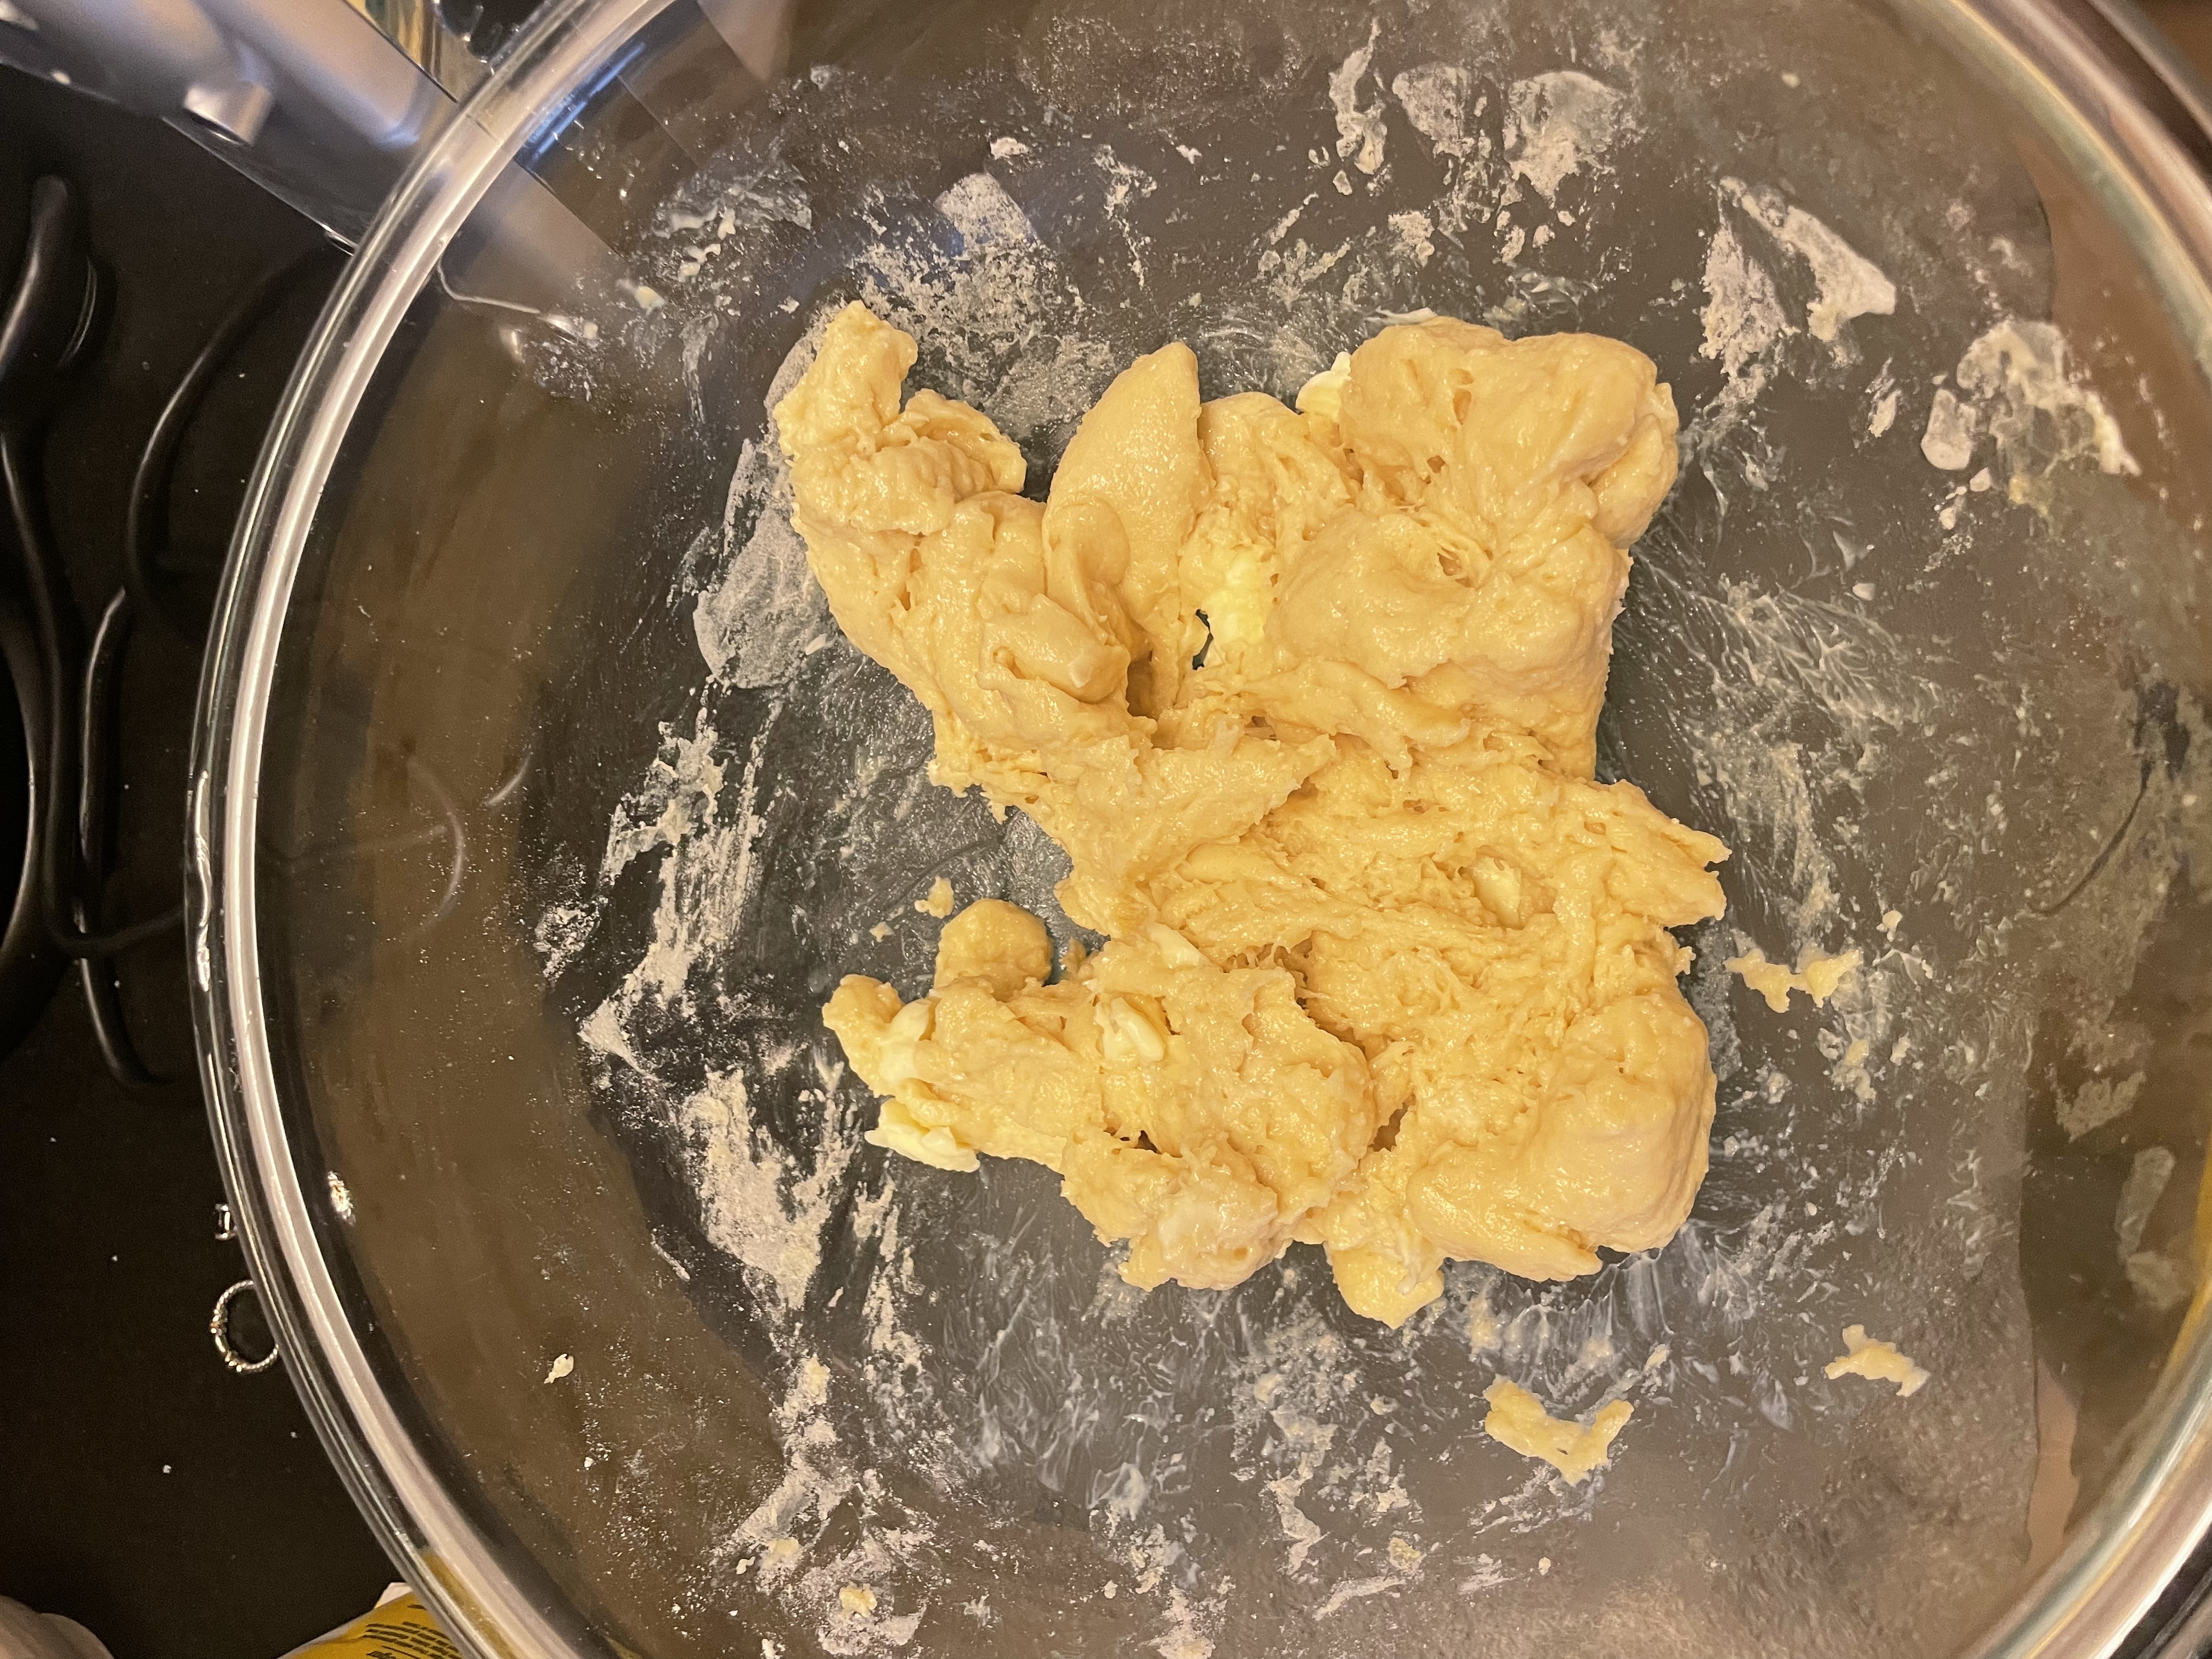
Once again you might panic and think that all has failed because it looks like a horrible gooey mess. Well, keep trusting the process! I like to use my hands to break apart the butter an incorporate it. The butter will make the dough break apart and look like oily pellets. Just keep going, and at some point, the dough will come together and be shiny. As with the salt, adding the butter in late is key too.
The dough is properly mixed when you can stretch it slowly and it becomes a bit translucent (like looking through a misty windowpane). If the dough is breaking immediately as you stretch, you need to knead it a bit more! If you are hand kneading, add 5 minutes more.
Step 3: First Proof (1 Hour) and Shaping the Dough
Once the dough is combined (see below, just give the oily dough some kneading time!), cover it and put it in a warm place to proof for 1 hour minimum. It should double in size.
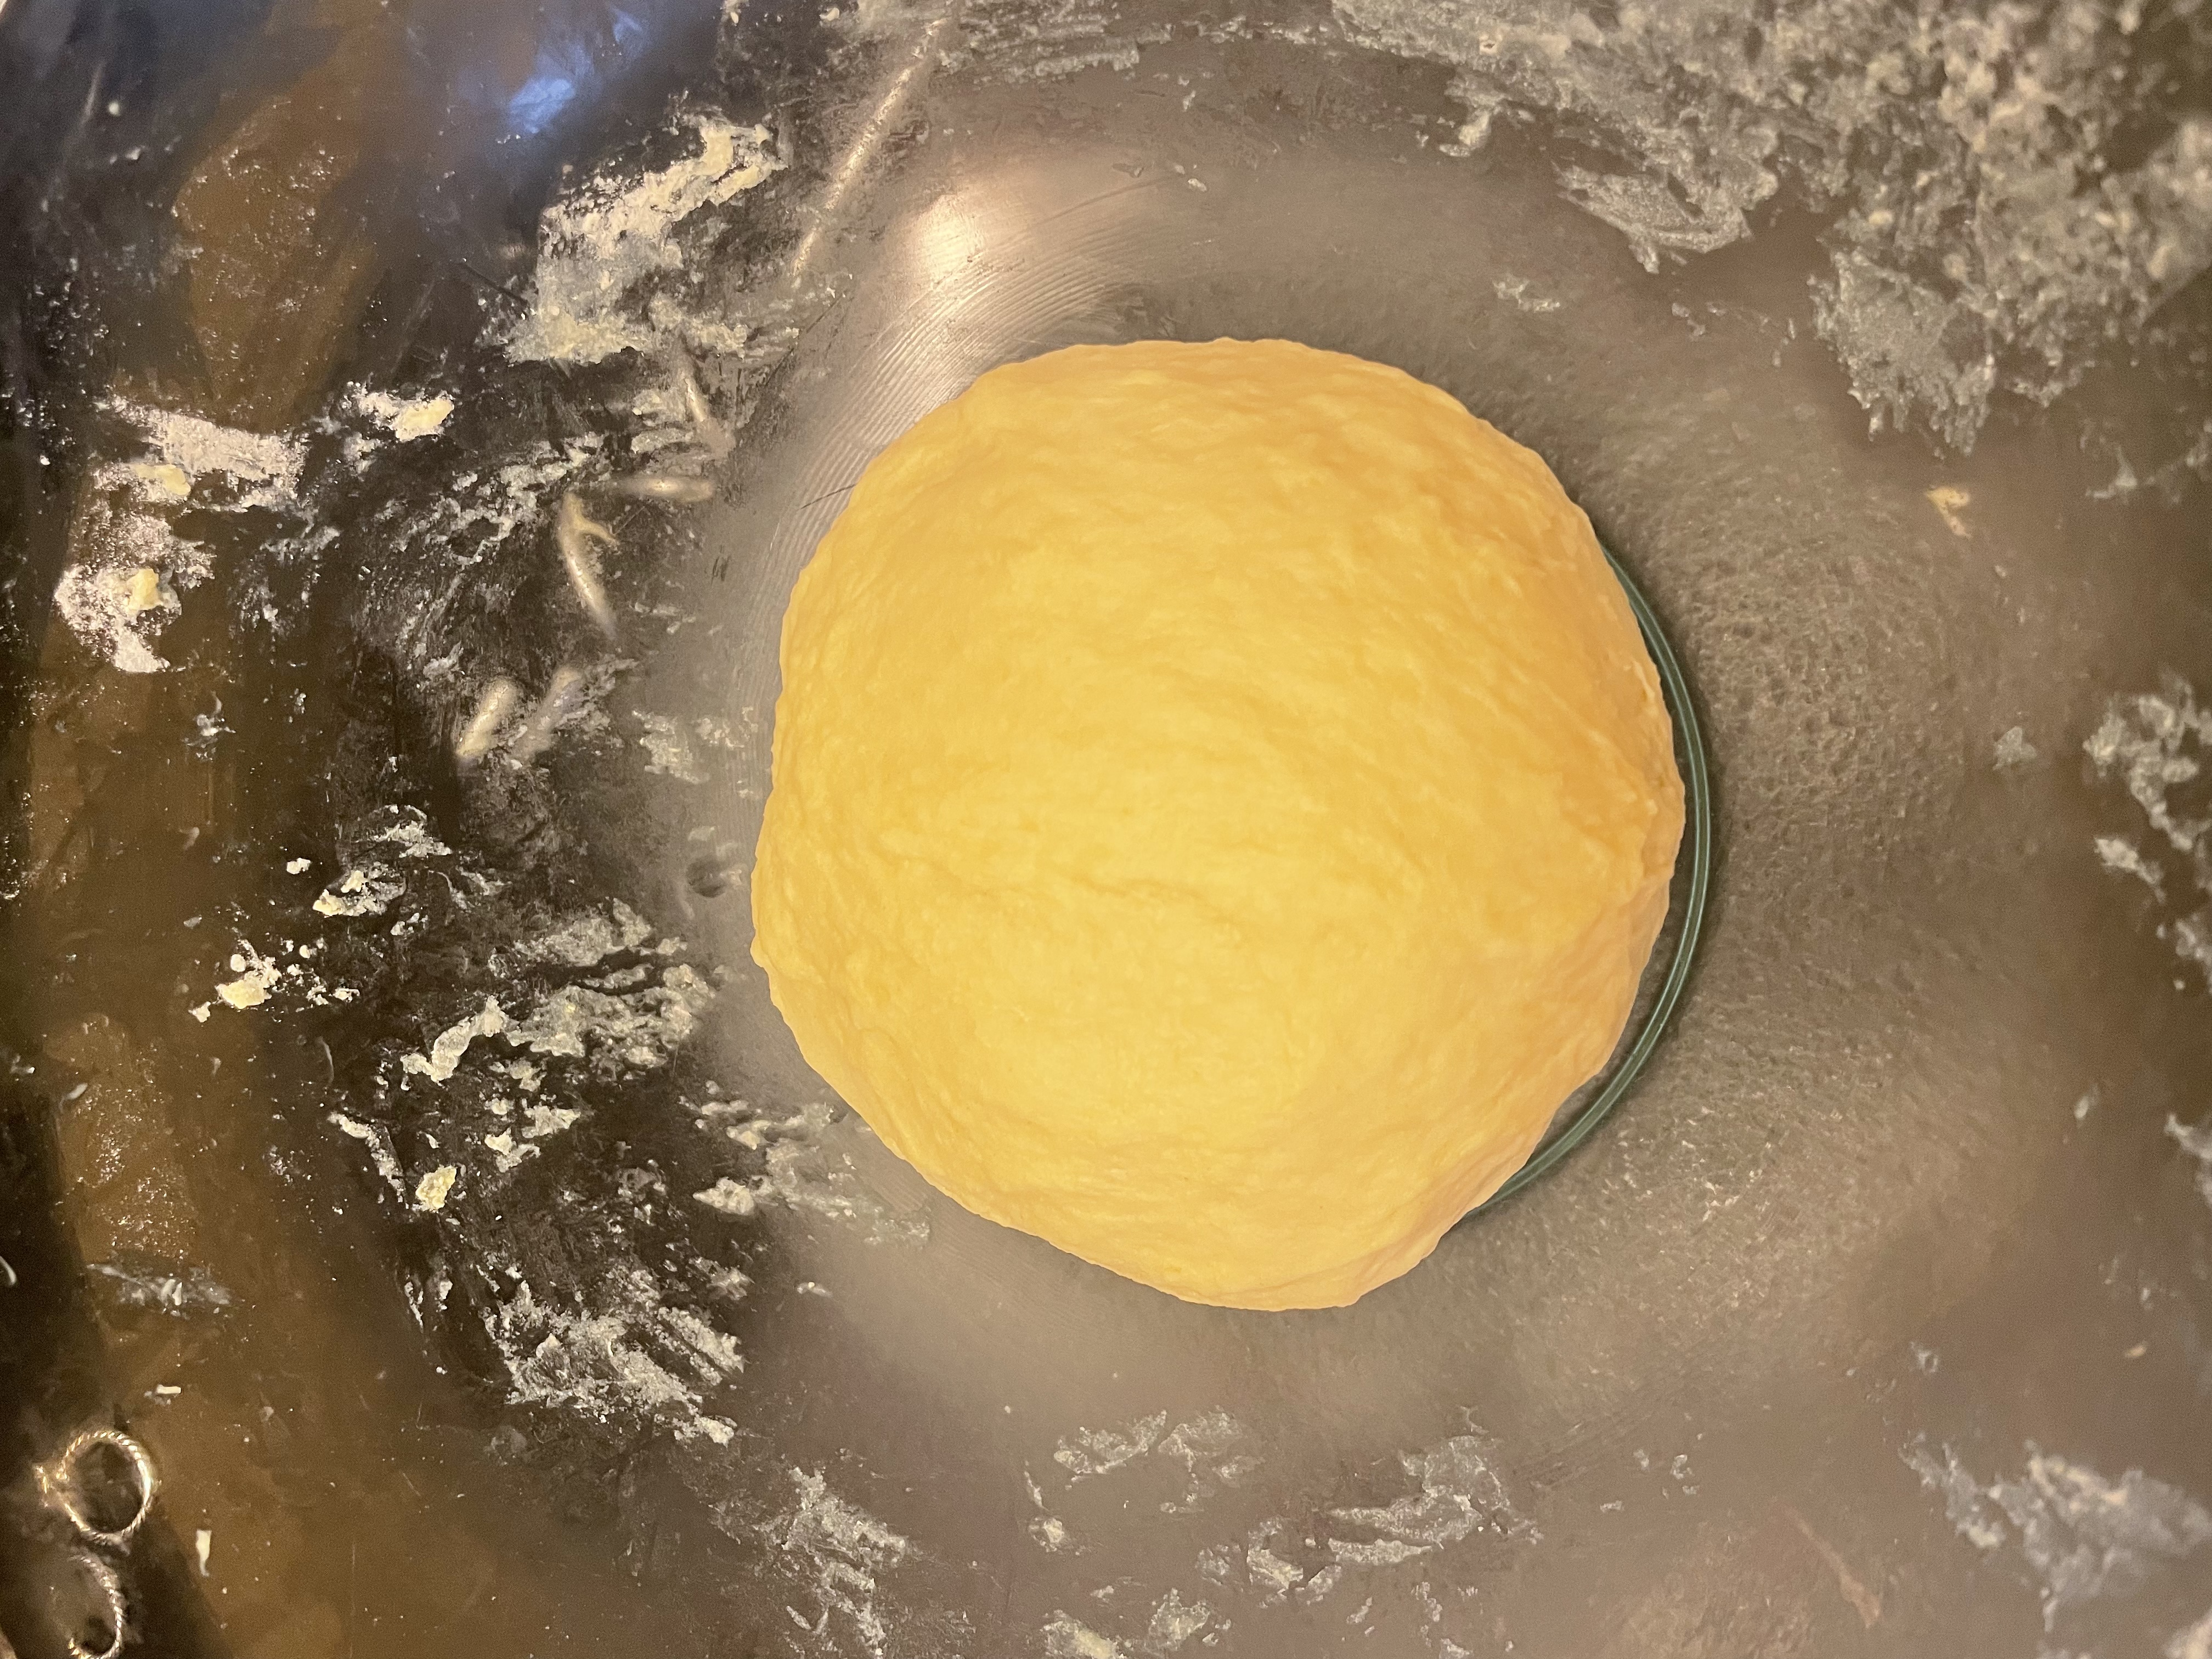
I have a bread proof button on my oven so I use that and do 1 hour, but if you don’t, just leave it some place warm. Sometimes I like to heat my oven at 350F and then turn it off so it is still warm, and then stick the bowl with the dough covered in.
After 1 hour or so, the dough should have risen quite significantly if not doubled.

Tip: Check by poking a hole. If it stays, then you’re ready to go! If it bounces back, keep proofing it until the hole holds.
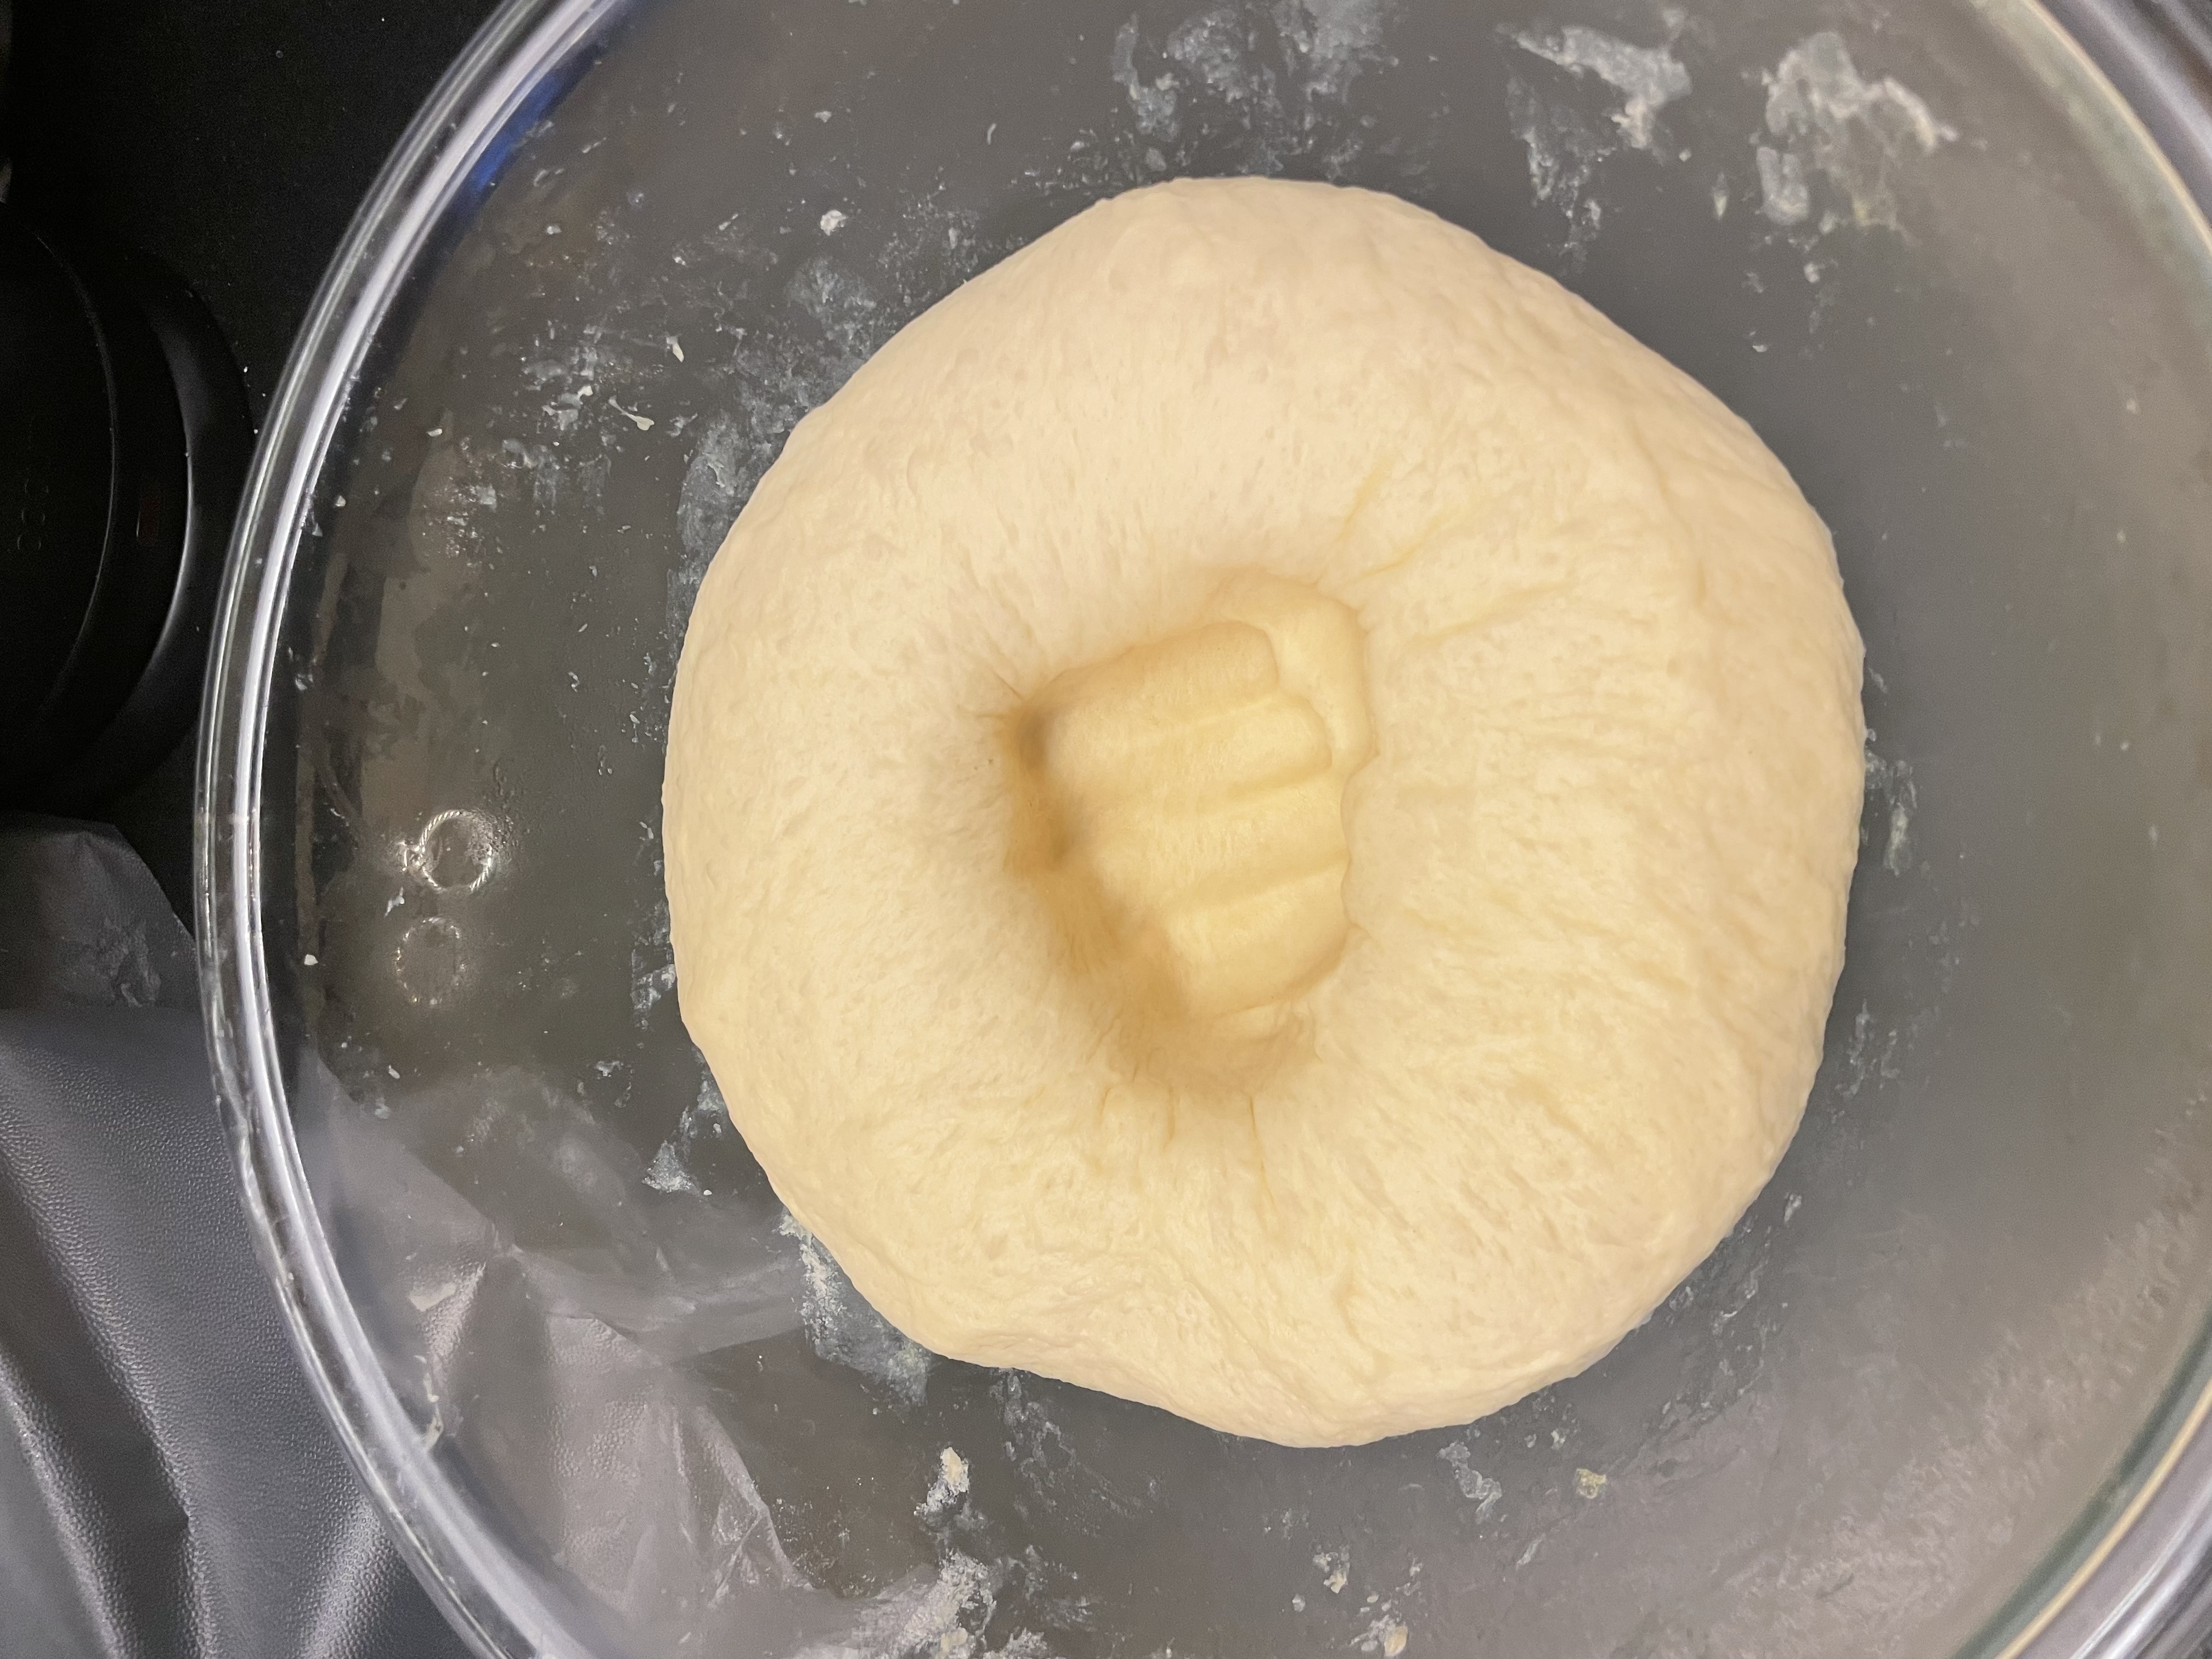
Give the dough a couple kneads to knock all the air out, and then shape the dough into even spheres, however many you want. I like to use the food scale for this to be exact.
At this point, you can roll out the dough and add fillings such as raisins, nuts, custard, red bean, whatever you want!
Step 4: Second Proofing (40 minutes)
If you want to bake on the second day, do this second proofing in the fridge. Just cover it and leave it in the fridge over night and then take it out the next day to come to room temperature.
If you are baking the same day, which I always have because I always need to eat it now lol, please proceed!
Put on a baking tray / tin and cover. Put 4 on 1 tray, don’t crowd them because they will increase in size again. Let proof another 40 minutes in the warm area.
The dough should increase in size again. Brush with egg wash, which is 1 egg + milk or water. Add sesame seeds if you want your breads to have them.
Step 5: Bake
If you are baking in a tin:
Bake at 350F at the third rack from the top (aka put your breads closer to the bottom of the oven) for 30-40 minutes.
Make sure to keep an eye on it - I usually take baking times with a grain of salt since every oven is different. The top should be a warm golden brown.
If you are baking on a tray:
Bake at 350F at the third rack from the top (same as the tin method) for 20-30 minutes. Again, just keep an eye on it!
Cool in the pan / tin for 5 minutes, then take it out and cool it on a rack.
Step 6: Eat them all!
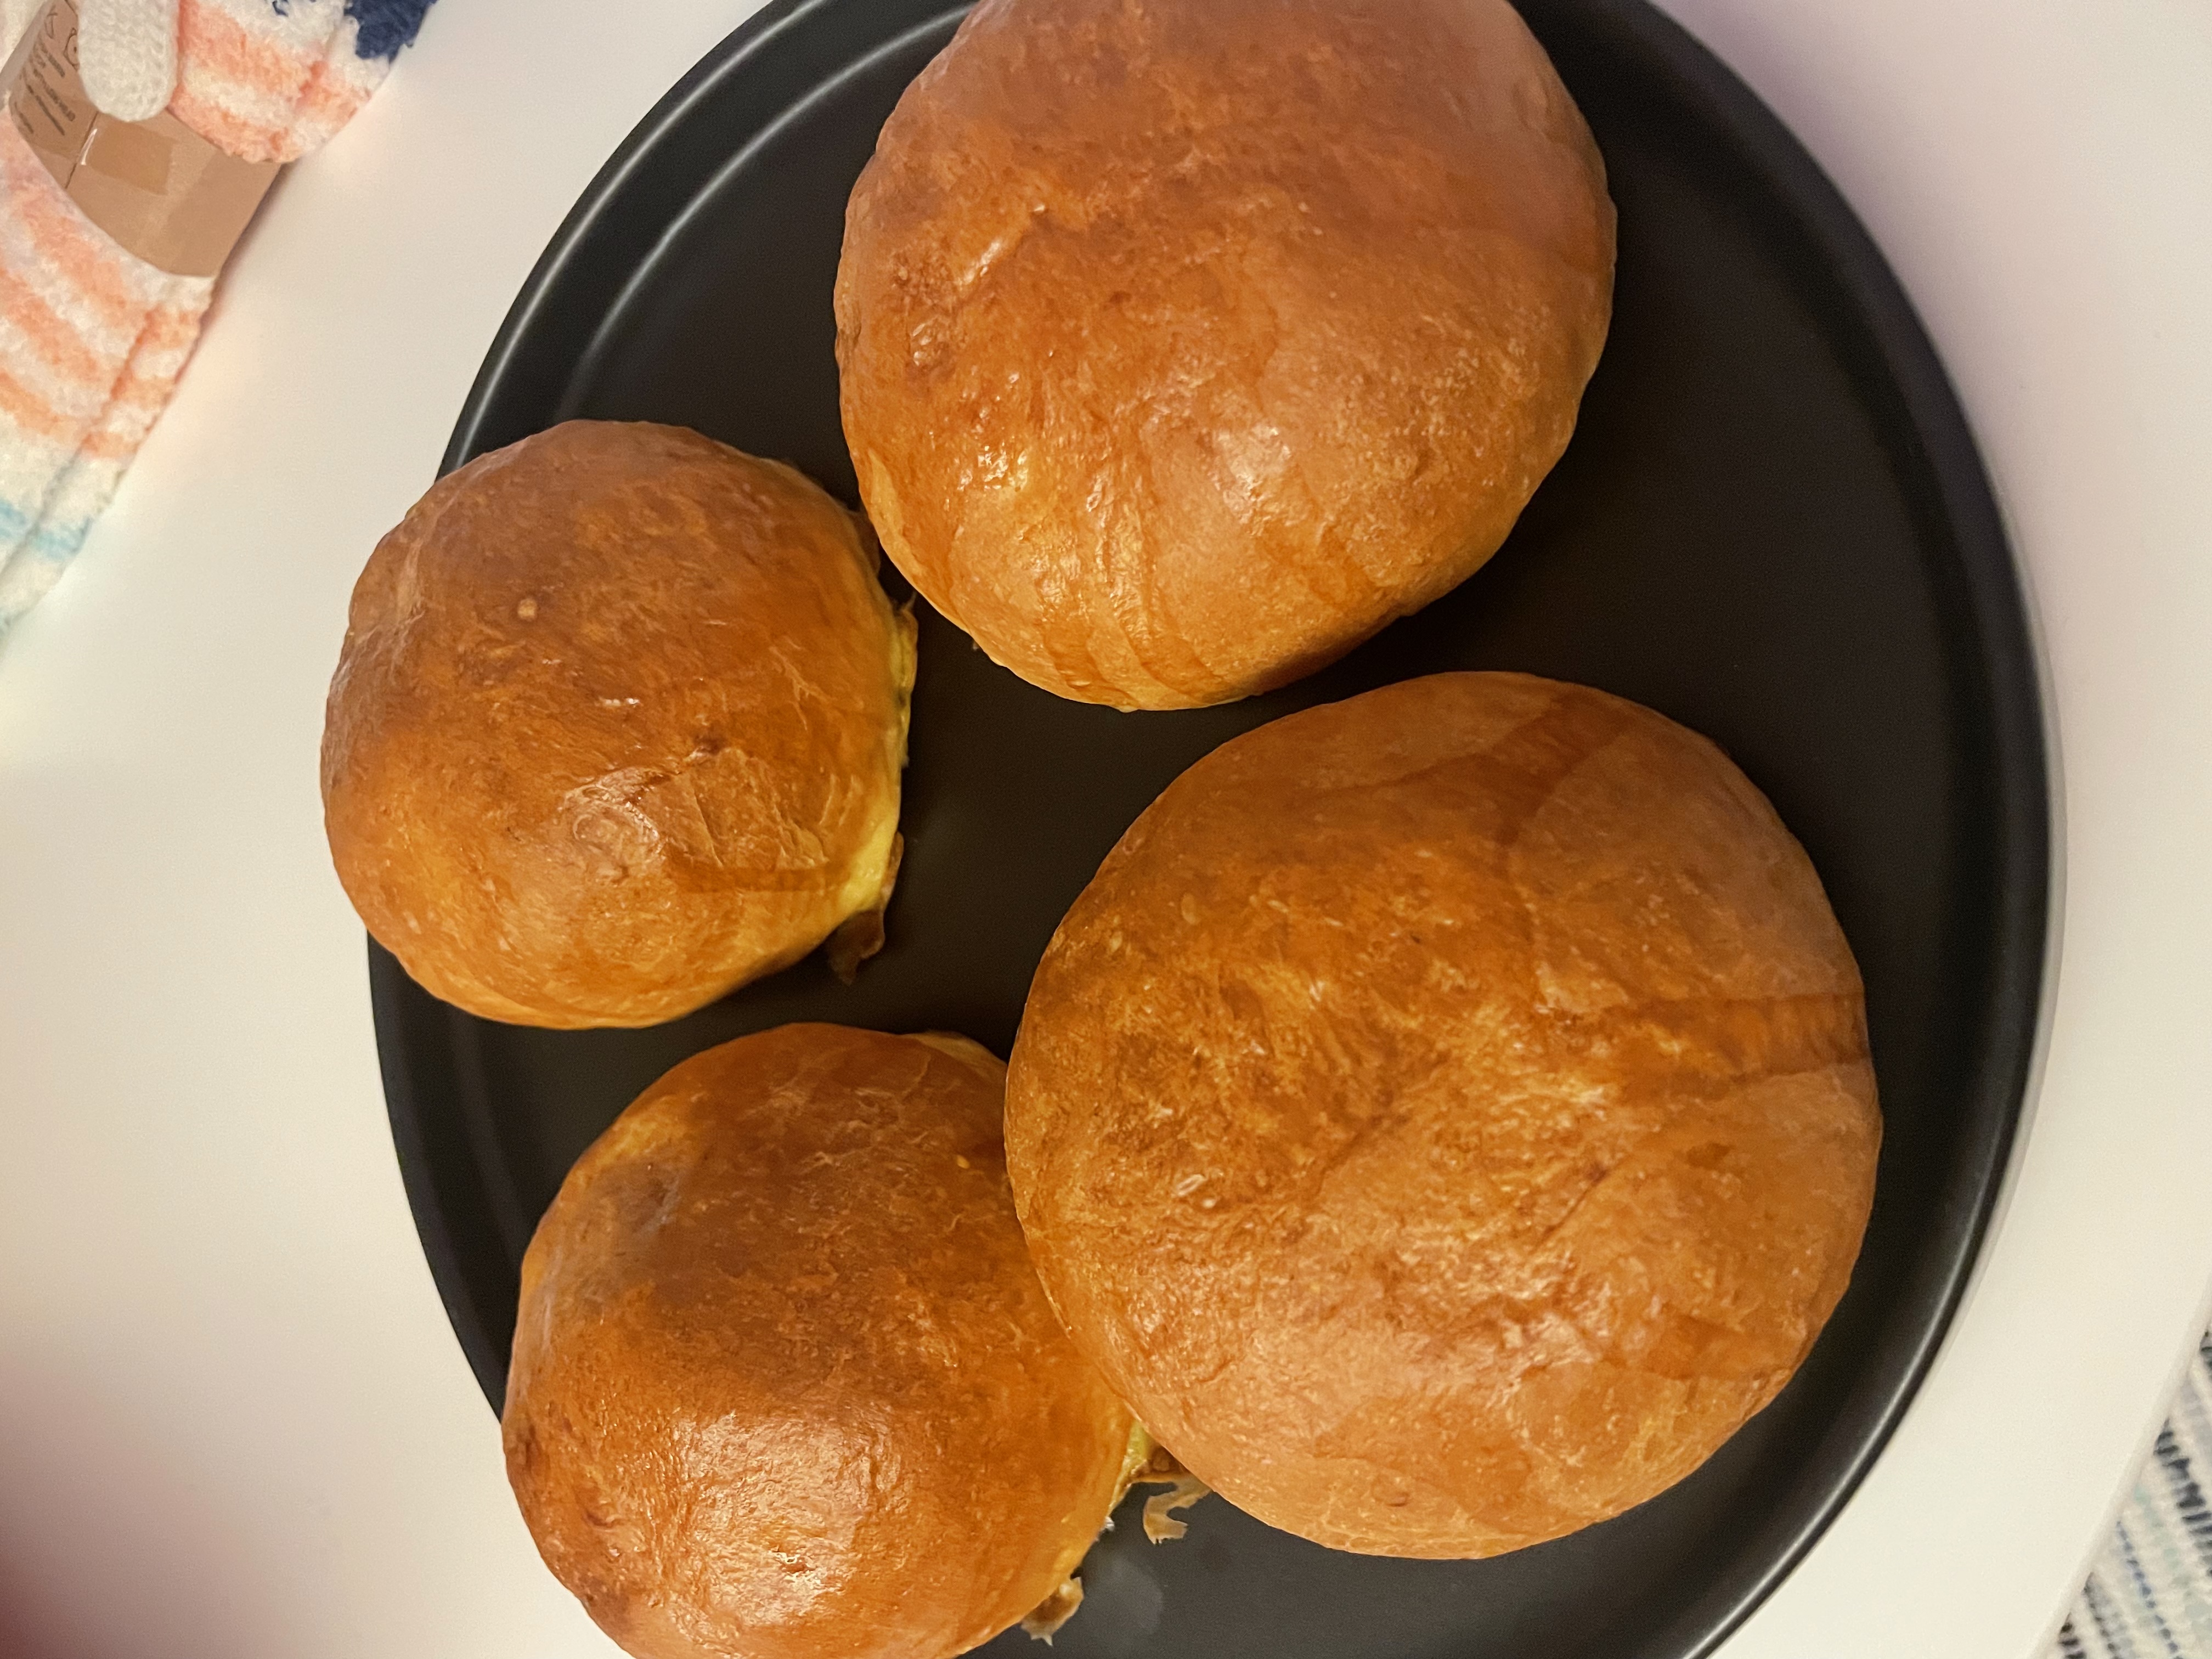
The hard work is worth it :)
These last 3 days on the counter, covered or in a bag. Putting them in the fridge will dry them out. Honestly not sure how they’d last more than 3 days, I eat them the same day! Or you can freeze them in bags and reheat in an oven at 350F for a 10-15 minutes. This will help them last months.
FAQ
What is Tang Zhong, what does it do, and why is it necessary?
Tang Zhong is basically a roux starter. This adds a lot of moisture into the dough and makes the bread fluffy and moist. This works because if you add 90ml whole milk directly into the dough, you might need a lot more flour to compensate. However, if you make the Tang Zhong roux starter and combine it together on the side first before adding to the rest of the dough, you can add a lot more milk aka moisture into your dough while adding less flour!
Do I need bread flour?
Technically you can try with AP flour, but bread flour has a higher protein content which is quite important for bread in general, hence the name. Thankfully it is very accessible in general grocery stores so I’d really try to get it if you can - most Asian baking recipes require bread flour, not AP!
Do I need whole milk? What about 2% or low fat?
You’re already baking bread, no need to cut on fats and sugars lol. But yes it does make a bit of a difference. It will still work with “healthier milks”, but if you want the best taste use whole! But it will work.
What is autolyse?
This is basically the process of letting your dough rest for 20 minutes to 1 hour after combining the flour and water together. During this time, the flour absorbs the water and activates enzymes to trigger the protein to start gluten development. The enzymes also break down the starch to simple sugar, which feeds the yeast while the dough is proofing. And this is all without kneading, how fantastic! Over kneading the dough can actually make the flavor and texture bad. This autolyse process reduces kneading time and increase the quality of your bread :) However, this method is a tad modified because instead of using flour and water, we are using milk. Yolo, recipes are meant to guide not force 😇
To reply you need to sign in.